This is the process of how I built my first homelab server for under AUD $60, what I planned to do with it and what I learned along the way.
I came across an HP ProDesk 400 G2 SFF listed for $60 on EBay. I knew this machine was never designed to be a server. It is a small office desktop built for basic work, not 24/7 uptime. But for this price, it felt like the perfect machine to experiment on without worrying about damaging expensive hardware so I added it to my cart and checked out.
The Plan
Before it even arrived, I had a rough idea of what I wanted this server to do. Nothing fancy, just practical services I could actually use.
My project scope for this server is to have a dedicated network attached storage to store files and backups, run a network-wide ad blocker, run my project docker containers and host some web projects. I also wanted this project to force myself to learn Linux Ubuntu server, networking, and system administration properly instead of relying on theory alone.
I decided to use an operating system called Proxmox. It is a popular OS in the homelab community and seemed like the correct choice. Proxmox will allow me to create multiple virtual machines. I can utilise this to separate my personal homelab from coding projects. So it’s like have multiple server inside a server (mind blowing, i know).
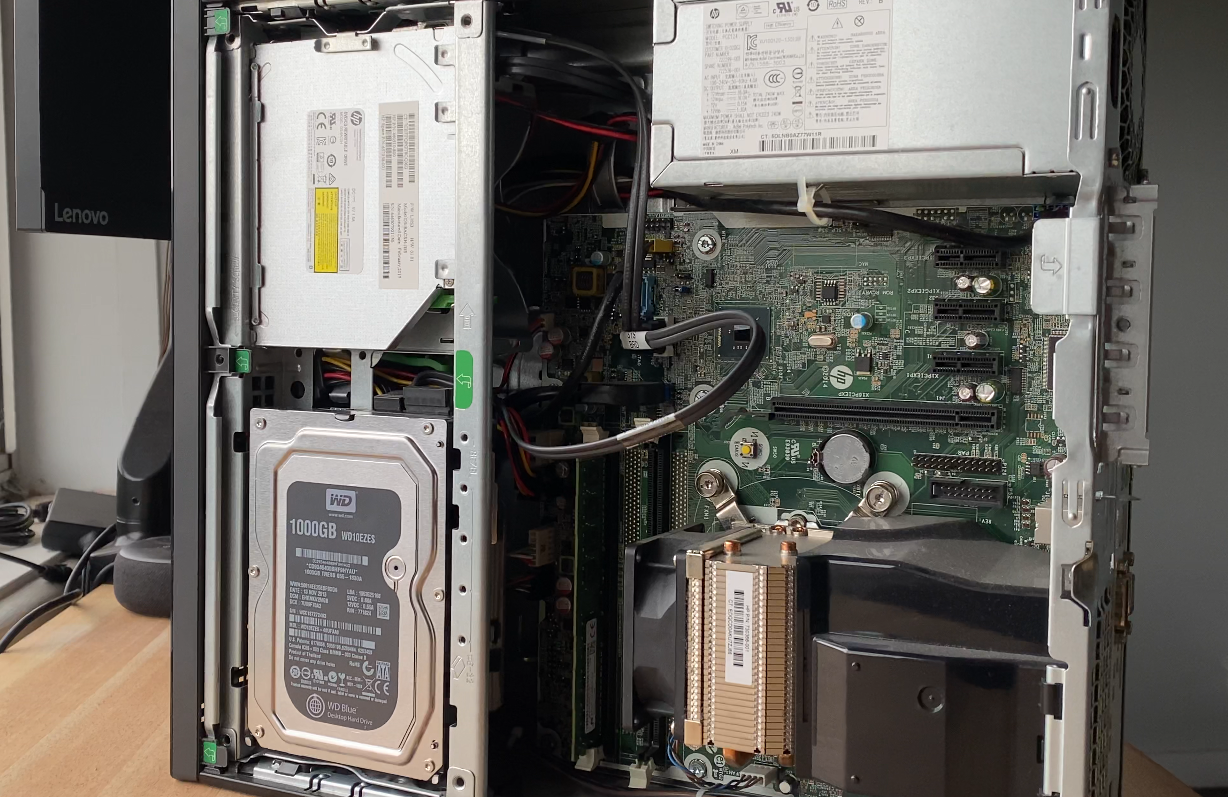
Hardware and Upgrades
The server specs were simple:
- HP ProDesk 400 G2 SFF
- Intel i5-4590
- 12GB RAM
- 128GB SSD (Boot Drive)
- 1TB HDD (Storage)
The Setup
Host (Proxmox)
BIOS Setup Because this machine lives headless (no display) and I have no power backup yet, I had to ensure it could recover on its own if the power flickered. I configured the bios to automatically turn on when plugged.
Networking & Remote Access I wanted to manage the server on my laptop from anywhere network. So I set a static IP on my router and enabled SSH immediately. I also used Tailscale so I could access my server securely anywhere.
VMs Setup I created 2 virtual machines. One is for my personal use and the other for hosting projects.
VM1 - Homeserver (Ubuntu 24.04)
Storage & Sharing I set up Samba for file sharing. The tricky part was configuring it to play nice with both my PC and my Apple Devices. After some tweaking, I have a reliable network share that works seamlessly across different operating systems for backups and media.
Ad-Blocking I used Pi-hole to act as a network-wide ad blocker. It has significantly cleaned up and blocked most of the ads especially on Netflix that I access on my phone and TV without needing browser extensions.
VM2 - Projects (Ubuntu 24.04)
Containerized Deployment I installed Docker to run my apps in containers. This made it much easier to spin up services, test projects, and deploy them.
Project Management I set up Dokploy as a lightweight self-hosted platform. It lets me connect my repositories and deploy web projects quickly without manually configuring every container.
Reverse Proxy & Routing I configured Nginx to act as a reverse proxy. This lets multiple apps run on the same server while each one is accessible through its own domain or subdomain.
Domain & Security I used Cloudflare to manage DNS and add an extra layer of protection. I exposed only the necessary ports and routed traffic through Cloudflare so my services stay accessible but protected.
I’ve documented every command, config file I used. You can find the full technical breakdown here:
Detailed Setup Guide on GitHub
Power Efficiency

One of my main concerns was how much this would cost to run 24/7. Surprisingly, the machine is incredibly efficient. It averages a power draw of just 22W, totals around 15 kWh per month which is just about ~AUD $4.60 added to my monthly electricity bill.
Final Thoughts
This server isn’t a powerhouse. It’s not going to handle hundreds of thousands of users and host tons of services but I think it’s very much worth its price considering the programs and projects I get to do with it.
If you have been thinking about starting a homelab, I think this is the best way to start. I’ve learnt more by building than I ever will by just reading about it.