As a student, I’ve always used Google Drive and iCloud for cloud storage but I quickly realized that I have no control of my own data and I’m tied to these cloud platforms. So, I started searching on how to make my own cloud storage. That’s when I got hooked into homelabbing.
Homelabbing is a hobby of building and managing personal server infrastrature. For me, that sounded fun and challenging so I started looking for the hardware that I’m going to start with.
Hardware
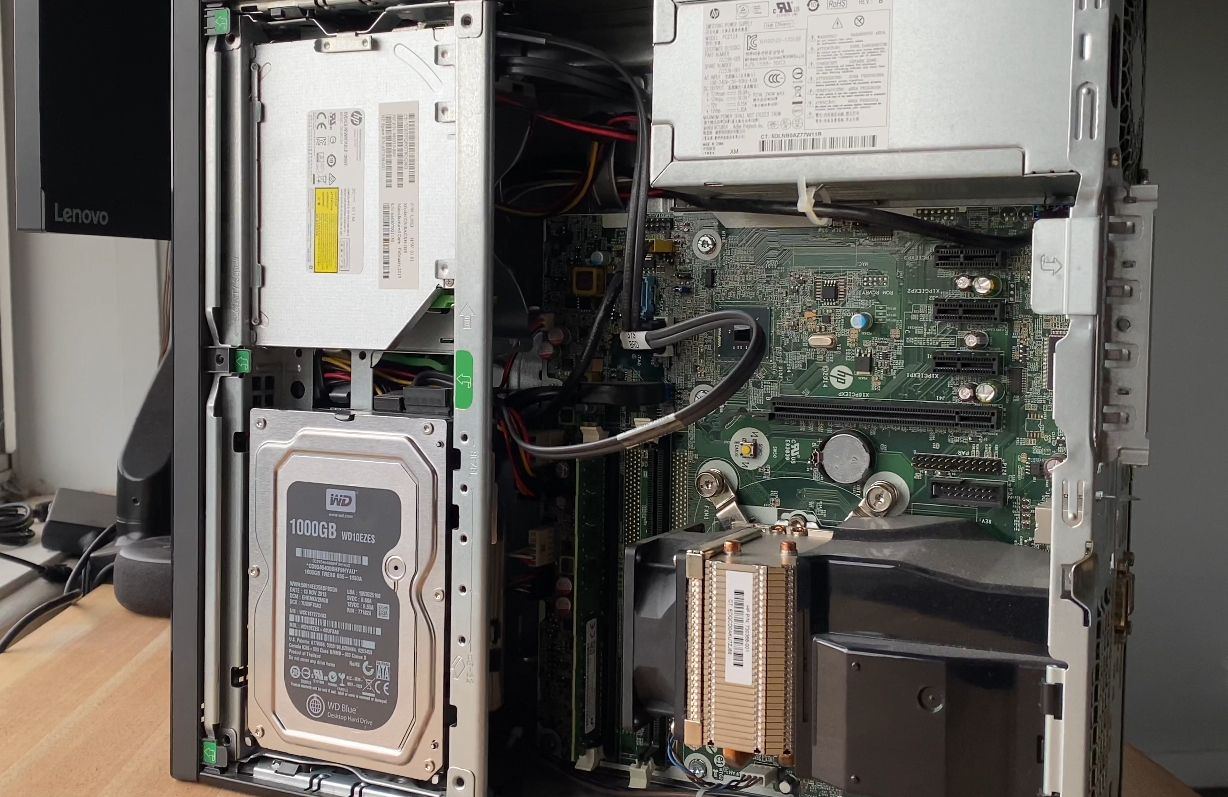
What I found was a HP Prodesk 400 G2 from late 2015. It might sound like it’s old and incapable of doing modern tasks but it’s actually a great computer to use as a server. It has an Intel i5 - 4590 (4c/4t), 4GB-DDR3 RAM and 1TB HDD.
While testing the computer, I found that 4GB RAM wasn’t enough for the OS that I want to use called Proxmox (more on that later).
So I decided to buy extra RAM sticks. Unfortunately, due to the RAM shortage, RAM prices skyrocketed. So I just decided to buy a stick 8GB RAM to have a total of 12GB DDR3 RAM instead of 16GB. But for my use case I think that should be enough, at least for now…
I also added a 128GB SSD as my boot drive so it boots faster and have more trust that the drive is not gonna fail.
Software
For software, I decided to use Proxmox as my operating system. Proxmox is an open-source virtualization management platform where you can create multiple virtual machines in it. It’s like the Microsoft Hyper-V from Windows.
I used Balena Etcher to burn Proxmox in my Flash drive. It’s very quick and simple process. I highly recommend this software for beginners.
Configuration
I installed Proxmox in my Server. I followed the guide from Proxmox website, Proxmox - get started. It was pretty straight forward and only took me 30 minutes to install.
After that, I opened my ISP router’s management console to give my Server a specific IP Address. This allows me to have my server in one specific local ip address for easy configuration.
I also used a dynamic dns from duckdns.org. This allows me to have a domain that is always associated with my Public IP
Then I started creating my virtual machines. One is for my personal use - this is where my NAS, VPN, Ad-Blocker and other personal apps is gonna live, and the other one is my Web Server - where I will use to host my website anthnyjhn.com and my other domains.
I decided to use Ubuntu Server 24.04 LTS as my operating system because I’ve been using Ubuntu as my main operating system for the past 4 years.
Node 1 - HomeServer (Ubuntu 24.04)
NAS (Network Attached Storage): Samba
I’ve setup Samba for file sharing and storing. The tricky part was configuring it to play nice with both my PC and Apple Devices. Apple devices tend to cut off connections randomly. I’ve created a Github Repository where all my config files and step-by-step guide are stored.
Ad-Blocker: Pi-Hole
Pi-Hole is my weapon of choice for ad-blocking. It is a very popular choice among the homelabbing community because it’s easy to setup and beginner friendly.
This not only allows me to block ads but to block websites as well. Giving me the ability to control what I want to access or not.
VPN (Virtual Private Network): Tailscale
For my VPN, I used Tailscale because it’s very easy to install and use. It has an app and allows a seamless account authentication via Google.
The VPN allows me to access my server including my files and have an ad-blocker from anywhere. It’s a very nice-to-have in your server.
I’ve documented every command, config file I used. You can find the full technical breakdown here: Setup guide on Github.
Node 2 - WebServer (Ubuntu 24.04)
DevOps
I installed Docker to run my apps in containers. This made it much easier to spin up services, test projects, and deploy them. I’ve also configured Nginx to act as a reverse proxy. This lets multiple apps run on the same server while each one is accessible through its own domain or subdomain.
Power Efficiency
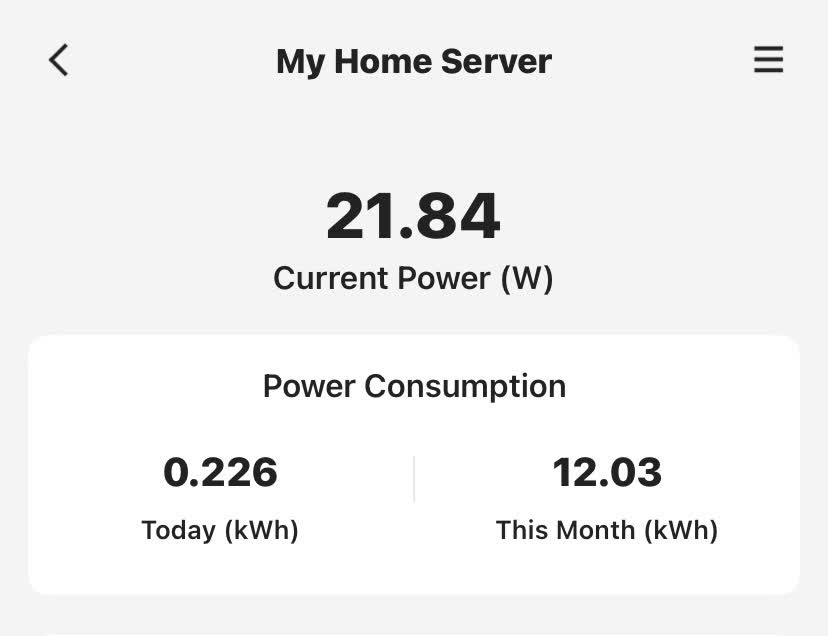
One of my main concerns was how much this would cost to run 24/7. Surprisingly, the machine is incredibly efficient. It averages a power draw of just 22W, totals around 15 kWh per month which is just about ~AUD $4.60 added to my monthly electricity bill.
Thoughts
I’ve been using this server for the past month and it hasn’t given me any headache yet *knock on wood. Jokes aside, I think it’s very much worth its price considering the services it provides.
If you have been thinking about starting a homelab, I highly suggest you do it ASAP. Not only you learn a lot from it but you get to own your own data and not solely rely on gigantic tech companies.